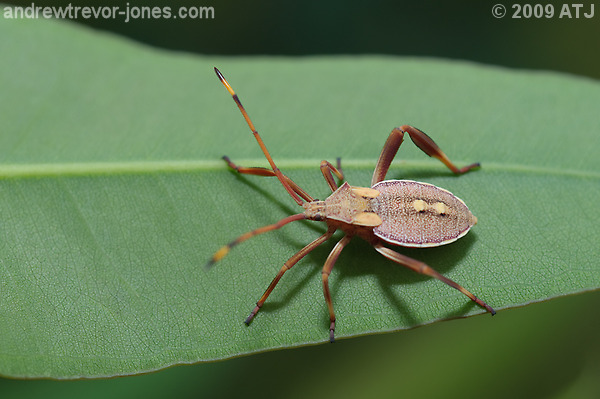
Figure 1: A crusader bug nymph, Mictis profana, shot with the standard diffuser on the flash. Note the harsh shadows. This photograph was exported from Lightroom without modification (other than resizing and sharpening).
Monday 16 February 2009
The light from a bare flash can be quite harsh causing deep shadows (Figure 1). This can result in the loss of detail in highlight and/or shadow areas of an image. A softbox can be used on the flash to soften the light (Figure 2). Basically a softbox provides a translucent area onto which the light from the flash is projected. The subject is then lit by the translucent area which is much larger than the bare flash resulting in more even lighting. To date I have made 4 softboxes, excluding prototypes. I use 3 of them on a regular basis for macro photography and I carry these three in my camera backpack all the time.
Figure 1: A crusader bug nymph, Mictis profana, shot with the standard diffuser on the flash. Note the harsh shadows. This photograph was exported from Lightroom without modification (other than resizing and sharpening).
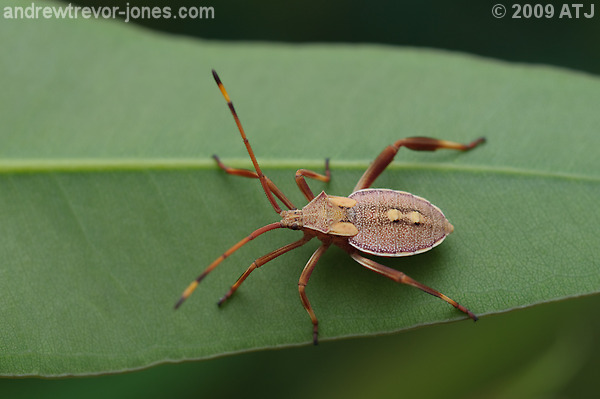
Figure 2: A crusader bug nymph, Mictis profana, shot with the collapsible softbox (Softbox2) on the flash. This photograph was exported from Lightroom without modification (other than resizing and sharpening).
My first softbox (Figure 3) was quite simple but at the same time very effective for softening light. One drawback with it was that it was quite bulky. With a bit of though I realised I could make a collapsible version (Figure 4) which does the same job and is easily carried because it collapses flat. This softbox is great for magnifications of 1:1 and less (i.e. 1:2, 1:3, etc.).

Figure 3: My first softbox.

Figure 4: The collapsible softbox mounted on flash diffuser.
When I started using tubes to get magnification greater than 1:1, I found that the collapsible softbox spread the light over too large an area meaning I often didn't have enough light to get enough depth of field through the use of small apertures. To solve this I made a third softbox which is smaller and puts the light closer to the subject. This one is made from cardboard and is lined with aluminium foil to maximise the light reaching the front of the sotbox. To ease mounting the softbox on the flash, I cut the front off a Nikon SW-10H flash diffuser and also drilled a hole so that the diffuser does not set the coverage to 14mm. When using this softbox, I set the flash to 105mm. Figures 5 and 6 show the softbox mounted on the flash.
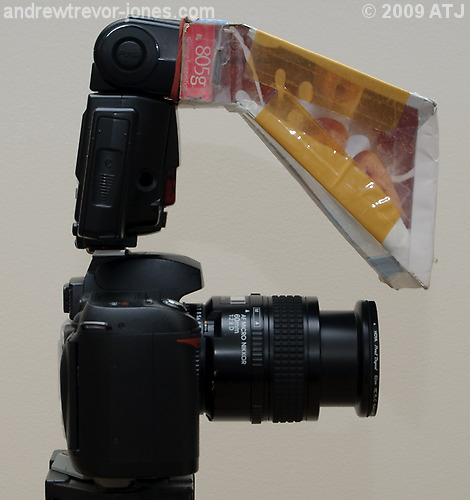
Figure 5: Softbox3 mounted on my SB-800 on my D70 with 60mm lens.
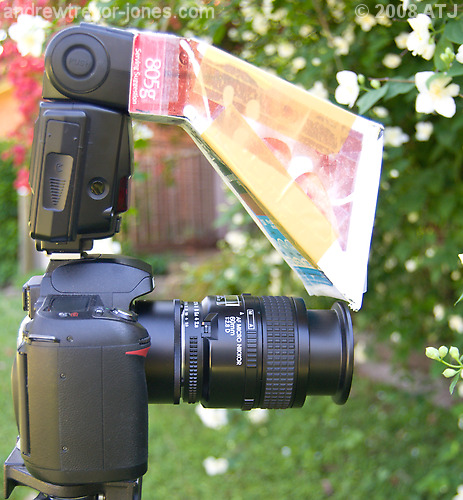
Figure 6: Softbox3 mounted on my SB-800 on my D70 with 60mm lens and PK-13 extension tube. The lens is focused on its closet focusing distance and the flower closest to the front of the lens is in focus.
When I bought my 200mm lens, I realised I needed yet another softbox, one that would extend the softbox to in front of the lens, bringing it closer the the subject. My 4th softbox (Figure 7) is based on the same design as the collapsible model but extends a lot further. The paper on the front is white tissue (wrapping) paper as this transmits more light than the copier paper I had used for the other softboxes. The flash is set to 105mm when using this softbox (which happens automatically when the 200mm lens is on the camera). I also needed a bracket on the bottom of the softbox which rests on the lens.
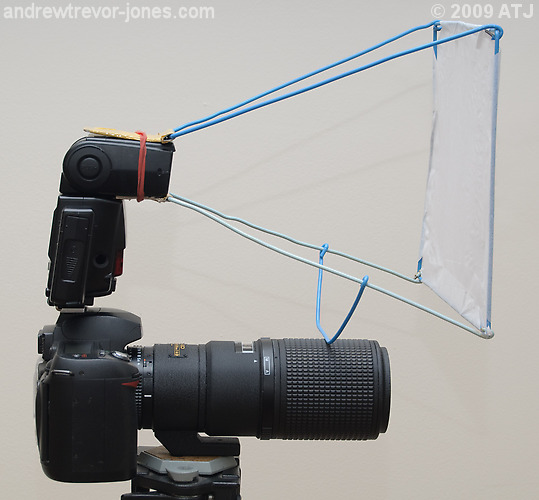
Figure 7: Softbox4 mounted on my SB-800 on my D70 with the 200mm lens.
Figure 8 shows the results of various flash options with the 60mm lens and a magnification of 1:1. The two bare flash options make use of the zoom capability of the SB-800. The SB-800 comes with a clip on flash diffuser which increases the coverage to 14mm. The Lambency Flash Diffuser is an inverted dome which fits over the standard flash diffuser. Softbox2 is my collapsible softbox and Softbox 3 is my compact softbox for very close work (magnification of 1:1 and greater).
Bare flash @ 105mm |
Bare flash @ 24mm |
Standard flash diffuser |
Lambency flash diffuser |
Softbox2 |
Softbox3
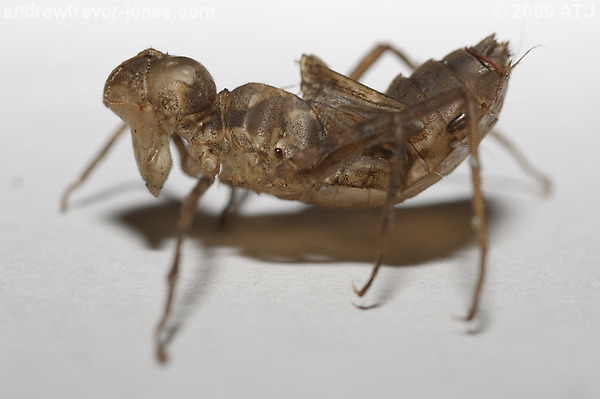
Figure 8: The last moult of a dragonfly taken with the 60mm lens at a magnification of 1:1 with different options on my SB-800 flash. Click the option to see the effect.
Softbox2 gives the softest light without harsh shadows. Softbox3 is not as good which is to be expected as it was really designed for greater than 1:1. Flash diffusers to help to soften the light a bit, but don't give as good results as the softboxes.
Figure 9 shows the results of various flash options with the 60mm lens and a magnification of 1:1.
Bare flash @ 105mm |
Bare flash @ 24mm |
Standard flash diffuser |
Lambency flash diffuser |
Softbox2
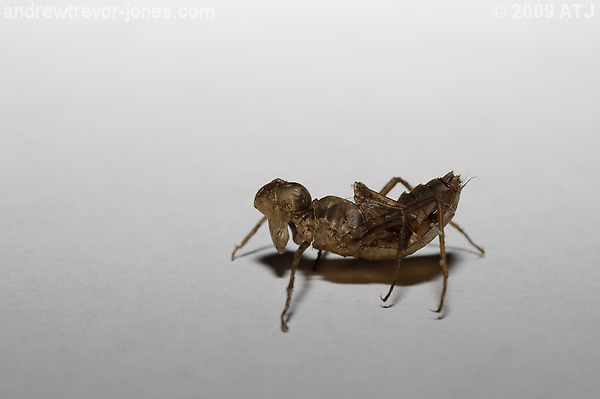
Figure 9: The last moult of a dragonfly taken with the 60mm lens at a magnification of 1:2 with different options on my SB-800 flash. Click the option to see the effect.
Again, Softbox2 gives the best results.
As mentioned above, the extra working distance of the 200mm lens requires a softbox that gets closer to the subject. Softbox4 does that. Figure 10 compares the bare flash @105mm to Softbox4 at a magnification of 1:1 with the 200mm lens.
Figure 10: Comparison of the light from the bare flash to the softbox with the lens at f/16 and a magnification of 1:1. Click the toggle button to switch between bare flash and softbox.
Figure 11 compares the bare flash @105mm to Softbox4 at a magnification of 1:2 with the 200mm lens.
Figure 11: Comparison of the light from the bare flash to the softbox with the lens at f/16 and a magnification of 1:2. Click the toggle button to switch between bare flash and softbox.
I now have a choice of three softboxes which I can use for different situations, each giving me pleasing lighting for my macro photography. My first collapsible softbox (Softbox2) is best for magnifications of 1:1 and less when using the 60mm lens. The compact softbox (Softbox3) is best for when I'm using extension tubes with my 60mm lens when magnification is generally greater than 1:1. When I'm doing macro work with my 200mm lens, I'll use the longer collapsible softbox (Softbox4).