
Figure 1: Common yellow robber fly, Ommatius sp. (ISO 800, 1/200s, f/6.3).
Sunday 15 February 2009
In January, I received a new Micro-Nikkor 200mm f/4D lens. This lens is to supplement my Micro-Nikkor 60mm lens f/2.8D which I have used since 1996.
My very first impression of the lens was when the courier handed me the package. I was surprised how heavy it was. Opening the package revealed that almost all of the weight was the lens itself. This is one heavy lens, weighing in at almost 1.2 kg, nearly 3 times the weight of the 60mm (440 g). The weight did not worry me too much as I would be using it on a monopod or a tripod almost all the time.
The lens itself looks very much like the old 60mm lens, only longer (and heavier as already mentioned). This is not surprising as they are both D lenses. Other than the size, the main difference is the gold ED emblazoned on the upper surface to indicate the use of ED (extra-low dispersion) glass in the lens elements.
I took the lens for its first outing the day after I received it - walking the dogs on their normal Saturday morning walk passed Lenox Bridge in Glenbrook. I was fortunate to encounter so interesting subjects on the walk and to photograph them. The morning was overcast which made for nice soft lighting. Unfortunately, there wasn't a lot of light which meant I had to work at ISO 800.
The first subject I found was a robber fly. In addition to the light being low, it was hanging to a vine which was being buffeted by the wind. This meant I had to keep the shutter speed up and the aperture fairly open, making for rather shallow depth of field. Despite the shallow depth of field, the result was quite pleasing.

Figure 1: Common yellow robber fly, Ommatius sp. (ISO 800, 1/200s, f/6.3).
The second subject was a flatwing damselfly. It was flying around and landing on the ground. I was able to get quite close with the monopod and shoot from directly above. I could use a slower shutter speed, closing down to f/11 and giving me enough depth of field for a pleasing image.
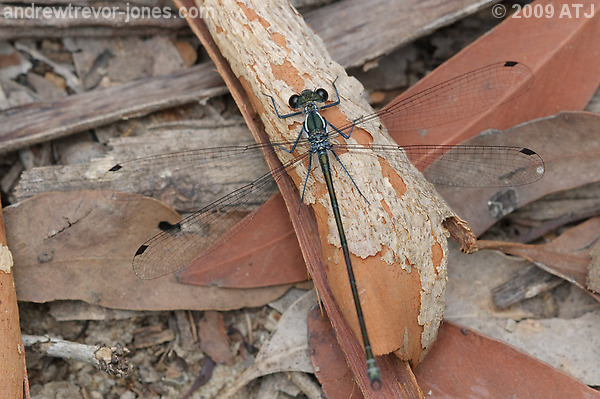
Figure 2: Common flatwing damselfly, Austroargiolestes icteromelas (ISO 800, 1/125s, f/11).
One of the main benefits I will get with the 200mm lens over the 60mm lens is the increased subject distance. With the 60mm lens, I need to get quite close to subjects, especially if I want high magnification. The 200mm lens is capable of the same magnification as the 60mm lens (up to 1:1 with the bare lens) but this can be achieved at a greater distance from the subject. This will be particularly helpful with skitty subjects such as dragonflies and butterflies. The lens will also be useful for birds and reptiles.
I took a few test shots of a ruler at magnifications of 1:1, 1:2 and 1:4 so I could measure lens to subject distance at those magnifications. The measurements are in Table 1 along with the photographs. I have also included the subject distance (pulled from the Exif for the images) which should be the distance from the focal place to the subject. As the length of the lens does not change when it is focused, I can't explain why the difference between lens to subject and focal plane to subject changes with the different magnifications. I suspect what is being reported by the camera may not be accurate, which is possible as it is not actually measuring the distance but rather indicating the position of the focus ring.
Table 1: Distance to subject at various magnifications with the 200mm lens
| Magnification | Frame width (DX) (mm) |
Distance from front of lens to subject (mm) |
Distance from focal plane (as reported by camera) (mm) |
|
| 1:1 | 24 | 260 | 510 |  |
| 1:2 | 48 | 483 | 710 |  |
| 1:4 | 96 | 910 | 1190 |  |
Table 2 shows a comparison of the lens to subject distance between the 60mm and 200mm lenses. As can be seen, the 200mm lens allows me to get quite a good distance away from subjects even when there is a fair amount of magnification.
Table 2: Lens to subject distance at various magnifications with the 60mm and 200mm lenses
| Magnification | Lens to subject with 60mm lens (mm) |
Lens to subject with 200mm lens (mm) |
| 1:1 | 75 | 260 |
| 1:2 | 128 | 483 |
| 1:4 | 247 | 910 |
One concern I had with the new lens was related to Depth of Field. I had been led to believe that depth of field with the 200mm lens would be shallower than I had experienced with the 60mm lens (at the same f/stop and magnification). Various online Depth of Field calculators show that at 1:1 magnification, the depth of field with the 200mm lens would be less than half that of the 60mm lens.
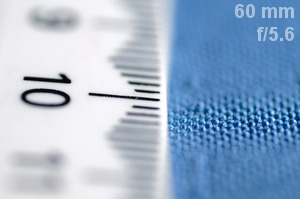
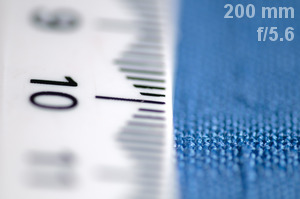
I wanted to show the impact of the difference in depth of field so I took a series of shots of a ruler at a 45º angle to the lens axis to show the difference. The only problem was I could not see any discernible difference between the images taken with the 60mm from the images taken with the 200mm lens at the same f/stops. Tables 1 and 2 show the results from DOFMaster Online Depth of Field Calculator along with images taken using the lenses as 1:1 magnification and various f/stops.
Table 3: Depth of field information for Micro-Nikkor 60mm f/4D lens at 1:1
|
|
||||||||||||||||||||||||||||||||
|
The values to the left are taken from the DOFMaster Online Depth of Field Calculator using a focal length of 60mm, subject distance of 21 centimetres and f/stops as indicated in the table The images to the right of the table were taken with the 60mm lens at a magnification of 1:1 with various f/stops. Click on the f/stop in the first column of the table to show the image for that f/stop. |
|||||||||||||||||||||||||||||||||
Table 4: Depth of field information for Micro-Nikkor 200mm f/4D lens at 1:1
|
|
||||||||||||||||||||||||||||||||
|
The values to the left are taken from the DOFMaster Online Depth of Field Calculator using a focal length of 200mm, subject distance of 50 centimetres and f/stops as indicated in the table The images to the right of the table were taken with the 200mm lens at a magnification of 1:1 with various f/stops. Click on the f/stop in the first column of the table to show the image for that f/stop. |
|||||||||||||||||||||||||||||||||
I scratched my head for some time over this and could not work out why the DOF from the two lenses looked so similar. A member of DSLRUsers pointed me to this article: Depth of Field, which explained that, assuming the lens construction was the same, the depth of field in macro photographs is not affected by focal length. i.e. if the magnification and the f/stop are the same, the depth of field will also be the same. The made sense with what I was seeing in the actual photographs I took.
Of course, one issue I would have is that for the same magnification, the camera to subject distance would be greater and using a flash (and softbox) for my primary lighting would result in the less light reaching the subject restricting how small an aperture I could use and this would mean less depth of field.
I have a number of options for lighting with the 200mm lens. The most obvious is to use ambient lighting. The "sunny f/16 rule" says that in full Sun at ISO 200, I can have a shutter speed of 1/200s and aperture of f/16. An aperture of f/16 is going to give me reasonable depth of field and 1/200s is just fast enough for a 200mm lens, especially if I use a monopod or tripod. The major drawback is the harshness of the lighting from the Sun. Sunlight generally results in lighting beyond the dynamic range of a digital sensor. There is frequently loss of detail in both the highlights and the shadows, especially when shooting macro. Under exposing by up to a couple of stops is will help to preserve detail in the highlights but results in even more loss of detail in the shadows. Flash fill can be used for the details but it is not easy determining the right combination of under exposure and flash exposure. Figure 3 is a shot taken by under exposing ambient light and using flash fill for the shadow details.
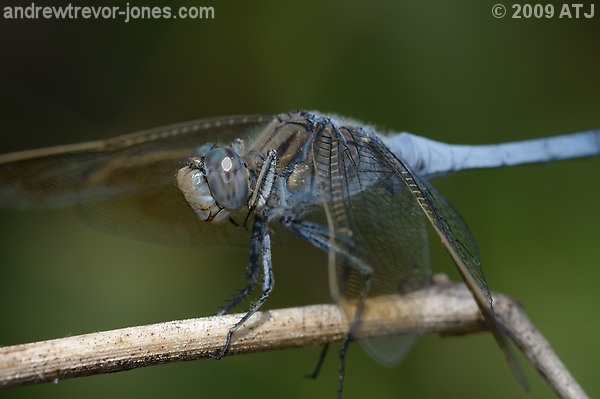
Figure 3: Blue skimmer dragonfly, Orthetrum caledonicum , shot at ISO 200, 1/125s and f/16. This represents under exposing to the ambient light by two thirds of a stop and flash exposure compensation of minus 2 2/3 stops.
As can be seen from some of my first shots with the new lens, overcast conditions can provide really nice soft lighting, although it is at the expense of brightness. The loss of light will vary with the amount of cloud cover. With thick clouds lighting could be significantly reduced forcing either a higher ISO, a lower shutter speed, a larger aperture or a combination of all three. This was the case in the photograph of the robber fly above. The other problem with overcast conditions is a change to the colour of light and matching white balance is not always easy. Nevertheless, cloudy conditions may be satisfactory.
The majority of time I use my 60mm lens for macro work, I use a flash (SB-800) for primary lighting and a softbox on the flash to soften the light from the flash. Using a flash means I can generally have more depth of field through smaller apertures if I want that and also get more consistent white balance. In most cases I can adjust the shutter speed (which doesn't affect the light from the flash) to control the background lighting. As the camera to subject distance is quite small, even at 1:4, there is more than enough light from the flash to be able to use small apertures, and that's considering the loss of light through the use of a soft box.
The greater camera to subject distances with the 200mm lens presents a challenge for using a flash with softbox. My existing softboxes as they are will not be effective with the 200mm lens as the increased subject distance reduces the effective size of the softbox making it more like a point light source. One possibility is to move the flash and softbox closer to the subject. The closer the softbox is to the subject, the larger the effective size of the light source will be. While in theory this would solve the problem, it introduces at least 2 new issues:
Manually holding the flash would mean I only have one hand left for the camera but also means that it is not easy to ensure the softbox is aimed in the right direction while at the same time worrying about focus and framing the shot. A bracket to hold the flash could be made quite easily or even bought (for example
I needed to come up with another way to get the softbox closer to subjects, not not too close to scare them away. The principle behind a softbox is to spread the light from the flash over an area and then use that area to light the subject. By simply moving the lighting area of the softbox further from the flash I could get the softbox closer to the subject without having to move the flash itself. So, I simply built a new softbox based on the design of my Collapsible Softbox but placed the paper further way so that it sits just off the end of the lens. As it sits off the end of the lens I added a loop which rests on the lens and holds the softbox at the desired height. I also used a single sheet of tissue paper (the sort used for wrapping presents) on the front to preserve as much light as possible. Figure 4 shows the softbox mounted on the SB-800 and my old D70 with the 200mm lens.
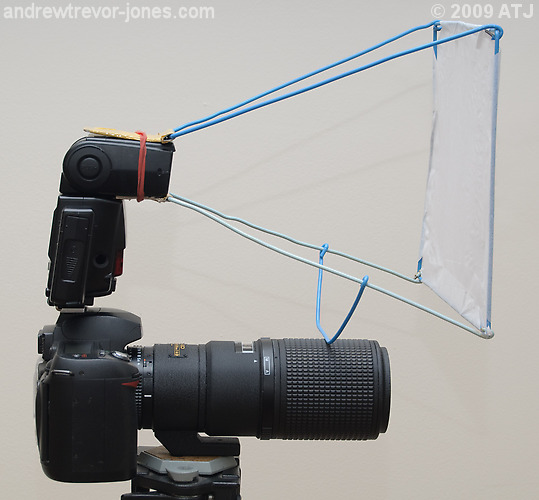
Figure 4: The new softbox mounted on the SB-800 flash on the D70 with 200mm lens.
The result from the new softbox are quite pleasing. The effect is not quite as good as it is with the 60mm lens, but there is noticeable softening of the light even at a magnification of 1:2 when the softbox is around 45 centimetres from the subject. Figure 5 shows how well it works at a magnification of 1:1 and Figure 6 shows 1:2.
Figure 5: Comparison of the light from the bare flash to the softbox with the lens at f/16 and a magnification of 1:1. Click the toggle button to switch between bare flash and softbox.
Figure 6: Comparison of the light from the bare flash to the softbox with the lens at f/16 and a magnification of 1:2. Click the toggle button to switch between bare flash and softbox.