
Ikelite D300 Housing - Front, showing port hole cap.
Monday 11 February 2008
I have had my Nikon D300 for a couple of months and I now have an underwater housing for it. I have used the housing on one dive so far and am reasonably happy with the results.
I have been using an Ikelite housing for my D70 for a couple of years. I have been happy with the system and so there was no reason not to go with Ikelite for the D300, once they were available, All the existing Ikelite gear I had would be compatible such as the lens ports and strobes, so the only thing I needed to buy was the housing itself.
Ikelite started shipping the housings in late December, but B&H (my preferred supplied) did not have them in stock until January. I was unwell for most of January and so put off the purchase until February. By the time I was ready to buy, B&H were out of stock and stayed that way for some time.
An alternative retailer of the housing was Adorama. I had not used Adorama previously, but had heard good things. One of the good things with Adorama is they accept PayPal payments from non-US citizens (B&H don't). One of the not so good things is the only choice for delivery is UPS. While I have not personally used UPS for delivery to Australia, I have heard mixed reports and so I was wary of their service.
Adorama's service ended up being pretty good. The order was made Sunday and they processed and shipped it out Monday evening. UPS's service was less desirable, especially on the Australian side. The parcel took just over 24 hours from the US to Australia and then 2 days to travel 70 kilometres. They were also not very forthcoming with information. Despite these difficulties, I still received the order on Friday afternoon and so had it for the weekend.
My only other dSLR housing is for my D70 so all my impressions of the D300 housing are based on a comparison with the D70 one.

Ikelite D300 Housing - Front, showing port hole cap.
The first thing I noticed was the housing ships with a cap over the port hole. The D70 did not have this and I have worried a bit about dust getting into the housing during storage.
The D300 housing is slightly larger than the one for the D70. It is around 2 centimetres wider (left to right), around 1 centimetre higher and around the same length (front to back). It has a lot more control knobs and buttons.
The eyepiece appears to be the same size as the one on the D70. This is a little disappointing considering that the viewfinder on the D300 is larger. I'll have to wait until I'm underwater to see how much of the viewfinder I can see.
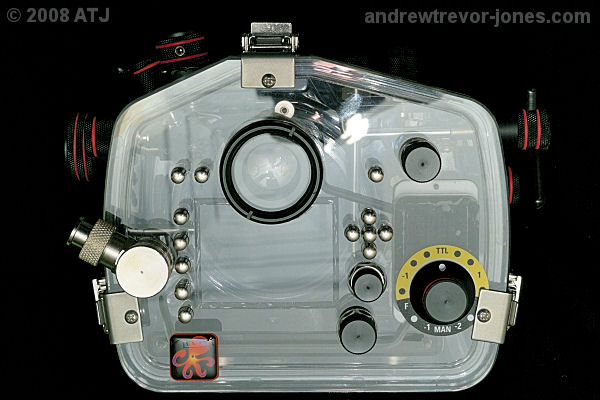
Ikelite D300 Housing - Rear, showing strobe bulkhead and Strobe/TTL controls.
The strobe bulkhead is slight higher and points diagonally up (around 10 o'clock) rather than diagonally down (around 7 o'clock) as on the D70 housing. It appears as though the bulkhead will align with my nose if I use my right eye for the viewfinder. The strobe bulkhead on the D70 aligns to my regulator 2nd stage when I use my right eye, meaning I can't put my mask right up against the eyepiece.
The Strobe/TTL controls have moved from the left side of the rear of the housing to the lower right. They have also changed from being a vertical line of lights controlled by two buttons, to being a rotary dial with no lights at all. This was a bit disconcerting when I first attached the primary strobe and switched it on. With the D70, there lights to indicate the strobe is on and the TTL circuitry of the housing is functioning. There is no such indication with the D300.
The mounting bolt on the camera tray can now be turned by hand. It still needs to be tightened with a screwdriver or coin, but at least the attachment can be done by hand. The same bolt on the D70 could only be turned with a screwdriver or coin. Additionally, the tray has a cut-out so the battery can be removed while the camera is still in the tray. As the D300's CompactFlash card door is on the side of the camera, cards can be removed and replaced, also, with the camera on the tray.
Finally, the shutter release lever is very different from the D70. For the D70, the lever points diagonally up (at around 10 o'clock) and you pull it down with your index finger. The one on the D300 housing points diagonally down (around 5 o'clock) and while you still pull it down with your index finger, it feels strange. I guess I'll get used to it.
While I am confident it wasn't required, I decided to water test the housing, without the camera. I assembled the housing with the o-ring (of course) and installed the 5530.50 dome port (with o-ring) and waterproof cap on the strobe bulkhead. I mounted the base plate, mainly for weight. I am actually using the base plate, from the D70 housing which is identical. It already has a harness attached so I don't have to move anything.
I undid the clip on the harness, which lets the harness extend, and put the assembled housing in a 200L drum of rainwater. It floated so I attached a dive weight to the base plate, with a cable tie. This was enough to sink the housing to the bottom of the drum. Note that I kept the other end of the extended harness out so I'd be able to retrieve the housing without getting wet.
I left the housing in the drum for around 15 minutes and then retrieved it. It was complete dry inside. Test successful.
I dried off the housing and removed the base plate.
As I had done with the D70 Housing, I printed a couple of small labels with my name, telephone number and email address and attached them to the inside of the housing, facing out. If I was to lose the housing this would increase the chances of getting it back.
For the first dive I decided to use the Nikkor 18-55mm lens. This would give me more flexibility with potential subjects and visibility. It had been very rough in Sydney of late with a lot of rain so conditions were not likely to be ideal for photography. I would also be using the 5503.50 dome port.
I set all the predicted camera settings before the dive in case I forgot in the excitement of the dive. I used the following settings:
I put in a CompactFlash card and formatted it. I also put in a freshly charged EN-EL3e battery. I removed the strap and LCD protector from the camera. I removed the lens from the camera and replaced it with the body cap. This makes it easier to get the camera into the housing. The lens can be put on the camera through the port hole. I also taped the pop-up flash down to prevent it from being accidentally popped up during the dive.
As I would be using 2 DS125, I set the "Conversion Circuitry Strobe ID Switch" to "DS 125 200".
I greased the back o-ring and carefully placed it around the rear of the housing. I mounted the camera on the camera plate and tightened the mount bolt, first by hand and finally with a screw driver. Next, I slid the Hot Shoe Connector into the hot shoe of the camera. With the port hole cap in place, I slid the back plate with the mounted camera into the housing, making sure all the controls were out of the way, but in the right places. I clipped the three lid snaps closed, ensuring all three were locked. I inspected the o-ring to ensure good contact was made the while way around. I turned the camera on and made sure all the controls worked.
Now, to mount the lens. I removed the port hole cap from the housing and then the body cap from the camera. I installed the 18-55mm lens to the camera and attached a +5 diopter lens to the front of the lens. The +5 has worked well with this lens and allows me to get a bit closer to subjects than the default +4. I can still get distance shots - not that they are common due to light drop-off. I placed the zoom clamp over the zoom ring and the zoom sleeve over the clamp, ensuring the ribs lined up with the grooves and that the gears on the sleeve engaged with the gears on the zoom control on the housing. I greased a port o-ring and placed it on the 5503.50 dome port. I put the port onto the front of the housing, closing and securing the two port locks. I turned on the camera again to make sure I could focus and zoom. All was good.
I reattached the base plate and prepared the strobes. I would be using 2 DS125 strobes as I had done with the D70. I charged both strobe batteries and attached them to their strobes. As I have two strobes, I used the 4103.52 dual strobe sync cord. I connected the strobe connector (with blue ring) to the strobe bulkhead on the housing, the master strobe connector (no ring) to the right hand strobe and the other connector (red ring) to the left hand strobe. I mounted the strobes to their ball/socket arms and the arms to the base plate. The set up was ready for testing.
As with my land strobes, I wanted to use Preset Manual white balance so I got out my Kodak Gray Card and set up the preset. This involves setting White Balance to Preset and holding down the WB button until PRE flashes on the control panel and in the view finder. I took a shot of the gray card using the two strobes for lighting and this recorded the gray card. I copied the preset to d-4 and added a comment of "DS125".
I took a couple of test shots to make sure everything was working.
As I have done with my previous two cameras, I took a shot of my two dive watches to ease of synchronisation between the time on the watch (which will indicate depth) and the time in the camera. With this information I can easily determine the depth at which each photograph is taken. I then attached my old Citizen Hyper Aqualand watch to the base plate to hold the sync cord in place on the left side and my compass to the right side to do the same thing.
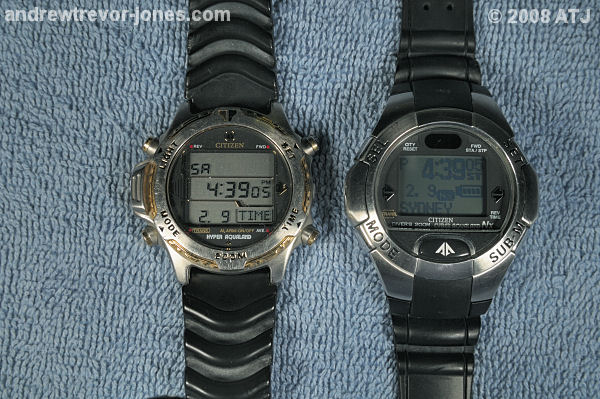
My dive watches before the dive to synchronise them with the camera.
The rig was now ready for the first dive.
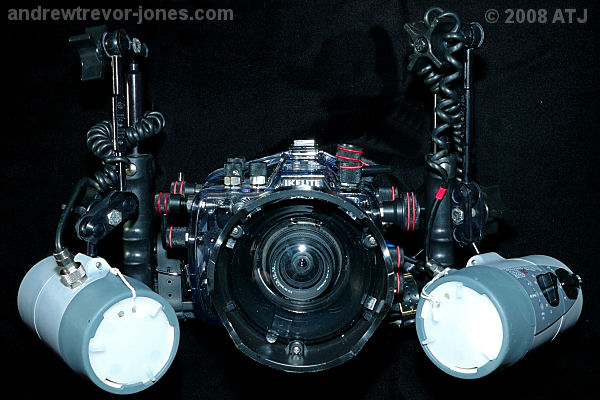
Assembled Ikelite D300 Rig.
Note: I have not included the best shots from the dive below, but rather those that illustrate points in the text.
Sydney had experienced a lot of rain over the previous two weeks and the last week the seas had been pretty rough. Conditions for the dive were not looking promising.
Entry is via the beach. After cleaning my mask and putting it on, I waded out to neck deep water and slowly lowered the rig into the water while checking underwater for any leaks. All was good so I put my fins on and descended to the bottom. No leaks and the camera was looking fine. I switched the camera and strobes on and we began our dive.
The water turned out to be clearer than I expected. Visibility was probably up to 5 metres and it generally doesn't get a lot better than that at Camp Cove. It was overcast, however, and that does make things look a lot darker and gives the impression of slightly worse Viz.
I wanted something interesting for my first underwater shot so I resisted the temptation to shoot just anything. I came across a pretty nudibranch, Ceratosoma amoena and thought it would make a good first subject. I realised that f/16 might be a bit large and decided to change to f/22. The knob to adjust the sub-command dial (used to adjust the aperture) is very close to the shutter release level. In adjusting the aperture I ended up taking a picture of sand. Not what I really wanted for my first underwater picture. I then took a few shots of the nudibranch but the 18-55mm lens doesn't really let me get close enough, especially when I forget to zoom to 55mm. I took the shot at 35mm. The strobes weren't pointing in the right direction, either.
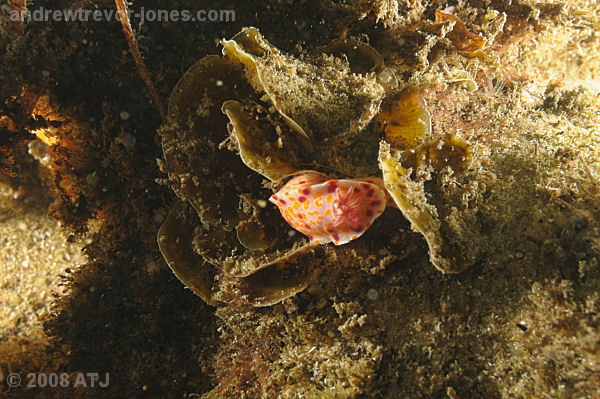
My first (intentional) shot underwater of a nudibranch, Ceratosoma amoena. In my haste, I forgot to zoom to 55mm.
After adjusting the strobes I got a couple of better shots, although still at 35mm instead of 55mm. A little bit further on I came across a yellow seahorse, Hippocampus whitei, in a seagrass bed. This would be a worthy subject. The seahorse was not very cooperative and kept turning away. It was also difficult to get a clear shot of it due to the seagrass. I managed to get a couple of just satisfactory images but nothing very good. They were a little overexposed and difficult to frame because I can't see the whole frame in one go through the eyepiece. This was a problem I had with the D70, too, and I don't think the D300 is any better and may even be slightly worse. Perhaps it is something I will get used to as I did with the D70.
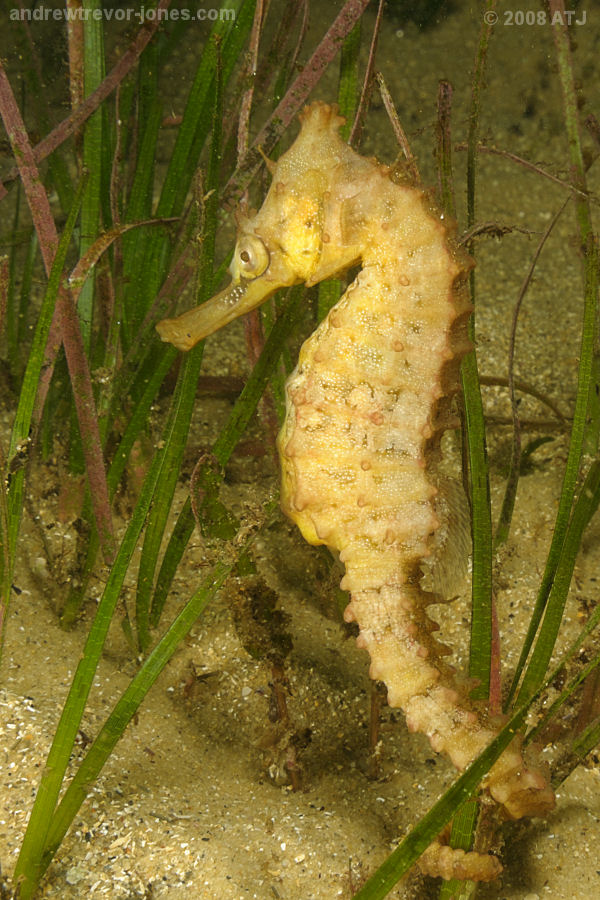
Seahorse, Hippocampus whitei.
Further into the dive I came across a small cuttlefish, Sepia sp. which was only around 2.5 centimetres (about an inch) long. It was another worthy subject. The cuttlefish was an opportunity to make use of the extra focus points. With the D70, I only had 5. One in the centre and four points away from the centre: left, right, top and bottom. With the D300 I have 51 which means I can better choose one that is more appropriate for the eye of the subject. For the cuttlefish I wanted a focus point to the right and just below the centre line, giving more space in front of the cuttlefish but keeping the cuttlefish vertically centred. Adjusting the focus points was quite easy using the buttons on the housing, but determining where they were was quite difficult as I was not able to see the full frame. I found myself adjusting the focus points, taking a photograph and using the LCD to determine if it was in the right pace. Again, this may take practice.
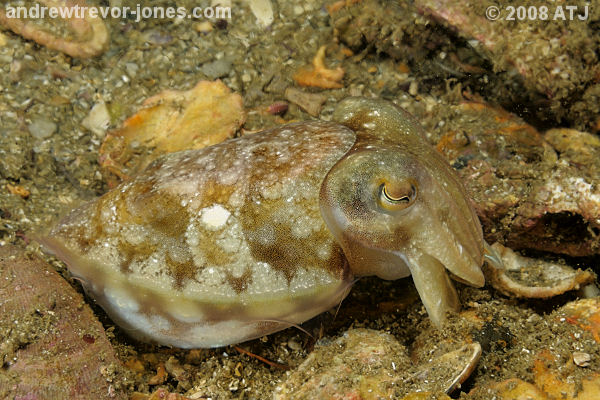
Cuttlefish, Sepia sp, possibly S. mestus.
It is worth pointing out at this point that the larger LCD makes a huge difference for reviewing the photographs. As I get older, my near sight is fading. I need glasses to read and I have trouble focusing on anything closer than 50 centimetres. Underwater, this means anything closer than around 70 cm. Having a larger LCD does make things a bit easier, but even so it is still quite blurry to me, underwater. I can at least judge exposure, especially as I have highlights turned on and I can also make out the focus point or if there is one. At one point on the dive, I managed to determine how many shots I had taken on after reviewing an image. I'm still not sure how I managed that.
Static subjects, like tunicates, were easy to photograph but fish were a little more difficult. I came across a spotted grubfish, Parapercis ramsayi which most of the time would sit on the bottom facing either left or right and sort of perpendicular to me. As it was a long thin fish, I needed the focus point to be either close to the left or to the right. The problem was, each time I tried to get close and the fish moved, it tended to orient itself the other way. I spent a lot of time changing the focus points, one problem of having so many.
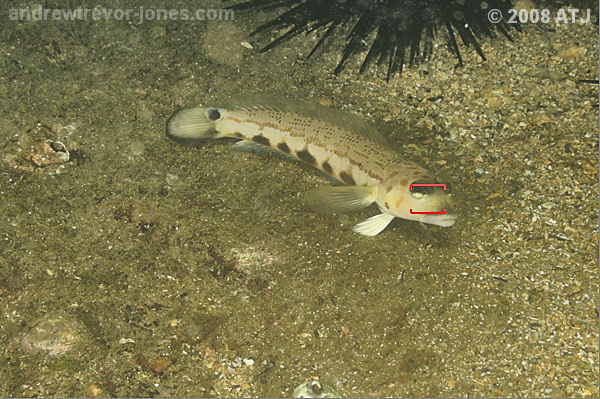
Spotted grubfish, Parapercis ramsayi, showing the focus point used.
At the end of the dive I came across a couple of nudibranchs together. The first couple of shots I took resulted in blown highlights which were clearly visible to me on the LCD. It was very easy for me to change the TTL settings to -0.7 EV by turning the dial. This was much easier than the buttons on the D70 housing, but doesn't have any lights to indicate non-standard settings.
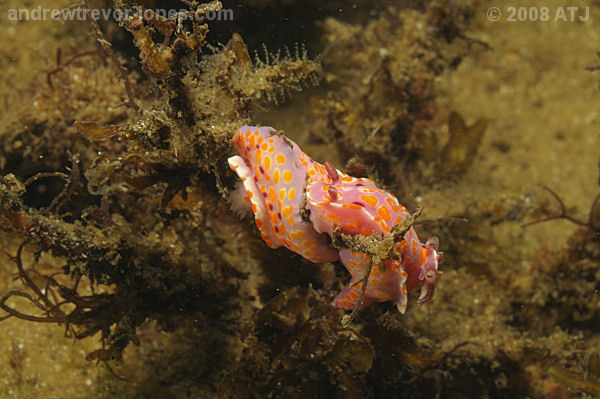
Nudibranchs, Ceratosoma amoena.
I ended up taking 80 images on the dive in the space of around an hour. Many of these were repeat shots of things like the cuttlefish and the seahorse. None of the images were real stand-outs. Even though I expected a better number of keepers, I'm not blaming the housing. It does appear that I may need a lot of practice to get used to the differences with the old housing. I should say that there wasn't a lot to photograph and substrate of most of the dive site is essential mud which doesn't make for a great background for photographs.
It was not until I looked at the images that I discovered I had the white balance on Preset d-3 rather than d-4. It appears that I didn't set the white balance correctly after I recorded it. This is was my fault and no failing of the housing. Fortunately, d-3 is pretty close to d-4. Additionally as I shot raw, the white balance could have been adjusted in post processing if it had been a problem.
Despite the less than stellar images from the dive, I am generally happy with the housing. At the very least, it lets me take a better camera underwater. I am disappointed with the eyepiece as I was hoping to be able to frame images better than I could with the D70. I am happy about the extra focus points, despite the extra work they may entail for some subjects. The larger LCD is a benefit underwater. The small LCD on the D70 could be used for nothing more than vague exposure checking. The shutter lever is very close to the sub-command dial knob and I will have to be very careful while change aperture.
I am looking forward to more dives to get to know the rig.
Here are some of the processed photographs from the dive and the dive log: Dive at Camp Cove on 11 February 2007.